For a long time, ice cream has become one of the most popular foods among all food lovers. The best-served food as a dessert or to satisfy hunger on summer days is frozen, cooled, and variously flavored colored ice cream.
Such ice creams can be made at home using various methods, and the whipped cream and cooling flavor improve the flavors to a heavenly sensation each time. So today, I will share some easy-to-make Nostalgia Ice Cream Maker recipes with you.
Following the nostalgia, ice cream maker recipes can produce the creamiest ice cream you’ve ever had.
The nostalgia maker’s motor allows for correct chilling and mixing, making the preparation techniques simple and tasty. So, let’s get started with the Nostalgia ice cream maker recipes.
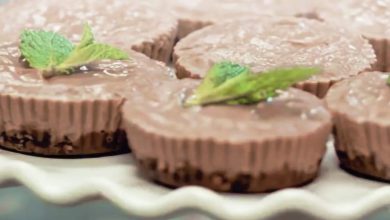
Using the Nostalgia Maker, make a classic ice cream recipe
It is one of the most delectable nostalgia ice cream maker recipes available. This recipe makes ice cream that is delicious, frozen, and creamy. So here’s how to make ice cream with a Nostalgia electric maker:

Nostalgia Ice Cream Maker Recipes
Ingredients:
- 3 cups of milk
- 2 cups of heavy cream (vanilla or any choice)
- 1 package Chocolate biscuits (any choice)
- 2 cups of sugar to taste
- 2 tsp of vanilla extract
- 3 cups of salt
- Ice cubes and crushed ice
- 2 eggs (mixed in a bowl)
Step-by-Step Instructions of Nostalgia Ice Cream Maker Recipes
Step 1: To produce a thick mixture, combine the heavy cream and milk in a food mixer. Half of the sugar and some broken ice should be added to the blender while the cream is chilled. Half of the sugar and some broken ice should be added to the blender while the cream is chilled.
Step 2: When the cream batter is smooth, insert the beaten mixed eggs and beat on high speed for 3-4 minutes, or until the cream is fluffy and smooth. After that, please put it in the fridge for 1 hour.
Step 3: It’s time to get the Nostalgia Maker prepared. Place the canister in the refrigerator for a few hours, filled with ice cubes, to keep it from melting ice.
Step 4: Remove the container after the canister’s ice cream mixture has reached the same temperature. Remove the remaining ice chunks and wipe them clean with a clean towel. Next, pour the ice cream mixture into the container and season with sugar and salt.
Step 5: Place the jar in a Nostalgia container with enough room around it for the ice cubes. Then, on both sides of the container, add ice so that it can perfectly chill the canister. Then, position the grinder in the centre of the canister and secure the top.
6th step: Place the motor on the container and begin making the ice cream mixture by rotating the canister and the ice cubes simultaneously.
If the ice and salt have decreased due to melting, add more. Season with salt as needed to preserve the proper taste. Finally, lift the top and remove the canister. Remove the ice cream adhered to the grinder using a spoon once removed. Then sprinkle the smashed chocolate biscuits on top of the ice cream.
Then, using a scoop spoon, form little ice cream balls, and your wonderful Nostalgia maker ice cream is ready to serve.
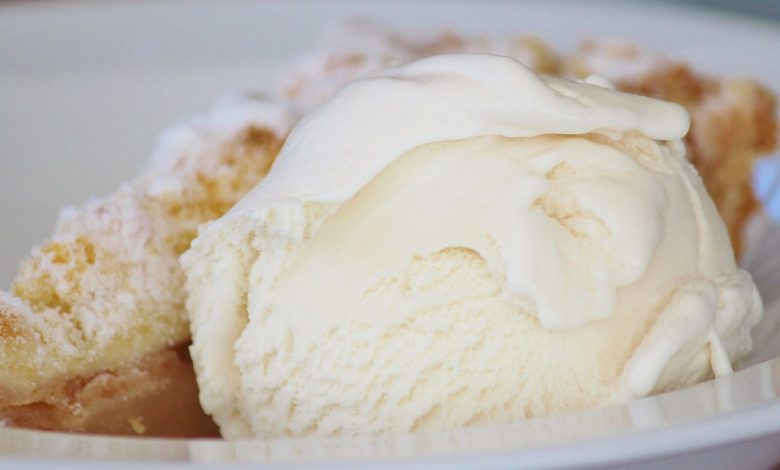
Vanilla Ice Cream Recipe for 4 Quarts
Several other 4-quart ice cream machine recipes are available, including vanilla. Making this dish at home using the old-fashioned ice cream machine recipes might save time while still producing a tasty product. Let’s get started with the recipe:
Ingredients:
- 3 eggs (mixed in a bowl)
- 3 cups of sugar
- 2 ½ cups of heavy cream (Vanilla flavor)
- 1 ½ cups of milk
- 1 tsp vanilla extract
- Ice cubes and salt
Methods of Making Vanilla Ice Cream Recipe for 4 Quarts
Step 1: Pour the prepared eggs into a large mixing bowl and beat with a hand mixer for 2-3 minutes to form a frothy and creamy foam.
Step 2: While mixing, put in the sugar and continue to mix at medium speed to obtain a uniformly sweet texture.
Step 3: Add the milk and thick vanilla cream when the cream has become thick and bubbly. Mix the ice cream ingredients until it is completely smooth and frothy.
Step 4: Pour the batter into the Nostalgia maker after adding the vanilla essence to improve the flavour. Cover the container’s lid and start to mix the ice cream once the container is filled with ice cubes and salt.
Step 5: To ensure the ice cream’s proper cooling process, add ice and salt as needed.
Then, remove the canister and thoroughly settle all of the ice creams from the grinder.Furthermore, it can be stored in the refrigerator for a freezing texture if desired. After the ice cream has cooled, scoop 4 quarts of the desired scoop and serve.
Conclusion
Various types of ice cream have created a variety of delightful moments for all food lovers. The Nostalgia maker can satisfy ice-cream desires to perfection because the preparation procedure is simple and can be done at home without difficulty.These ice cream recipes may be served as a dessert after any meal, as well as on hot summer days when you want to savour the cooling vanilla flavour in every bite.